Self Sovereign Bitcoin Stack with Hardware Wallet
Introduction⌗
Great visual and video guides on all things bitcoin can be found at https://bitcoiner.guide made by @BitcoinQ_A.
A specific guide for Specter Wallet can be found at https://bitcoiner.guide/specter/ and its from here that some of the Specter images in the following guide have been copied.
Images of the Coldcard screen and other Coinkite products are copied from https://coinkite.com.
Additional inspiration was sourced from Matt Odell’s guide at https://mattodell.keybase.pub/coldcard.html and @openoms, @21isenough and @KollerTobias's single seed multi-location backup scheme.
Starting equipment⌗
-
Coldcard Mk3 bitcoin hardware wallet
-
2 x Metal Seed storage plus any centre-punch or other tool required to mark it, (many alternatives available)
-
(Optional, but recommended) Cold Power or Power-only USB cable or USB power bank
-
Reasonably "clean" laptop (not full of pirated applications, for example). Linux or MacOS, no Windows, please?
-
Casino-grade dice
-
Bitcoin Wallet software
Finished items at end⌗
-
SD Card with "Coldcard Encrypted Backup" file written onto it
-
Password for "Coldcard Encrypted Backup" file
-
Coldcard PIN
The Seed, BIP39 Passphrase, Coldcard Encrypted Backup File and Coldcard Encrypted Backup File Password all benefit from increased redundancy. For example if you only have one Seed backup and you lose it, there’s no recovery procedure. They also benefit from being stored in multiple geographically distinct (and for the ultra paranoid perhaps politically distinct!) locations.
The "Coldcard PIN" is less critical: the bitcoin private keys generated are not related to the PIN in any way. If you forget the PIN, after 10 incorrect attempts you will irreversibly brick the Coldcard. However you can easily use your Seed + BIP39 Passphrase to restore the same bitcoin private keys on a new device in this event.
Combinations that can be used to restore the wallet⌗
-
Seed + BIP39 Passphrase
-
Coldcard Encrypted Backup + SD Card Password + BIP39 Passphrase
Do not store all the items from any one combination together. Noteably do not store Seed and BIP39 Passphrase together.
General Rules⌗
Coldcard⌗
-
Coldcard will never be connected to the internet.
-
Coldcard will never be connected to a device which is itself connected to the internet.
-
Coldcard will only perform a single function: signing validly-constructed bitcoin transactions for which it has the private keys available to do so.
-
Coldcard will only access bitcoin transactions (in order to sign them) via SD Card.
Backups⌗
-
Backup of a "Seed" phrase will be made into metal (disaster-resistant) storage medium. Two backups are better than one. Do you even have a backup unless you have 3 copies or more? etc.
-
"BIP39 Passphrase" (optional, highly recommended) will also be backed up either onto metal storage medium, and/or a secure passphrase manager, e.g. Bitwarden.
-
An optional "Coldcard Encrypted Backup" can be made on an SD card. This is encrypted with a unique password which Coldcard generates itself. This password should be backed up seperately to the card.
-
If an attacker obtains access to a seed backup plate, the BIP39 passphrase should be sufficiently complex to give you enough time to move the funds before the attacker can crack the Passphrase.
-
If you lose all copies of the seed, all funds will be irrevocably lost.
-
If you lose all copies of the BIP39 passphrase, all funds will likely be lost. Cracking a password is technically possible, but incredibly slow/difficult due to the algorithm used. Long/complex passwords are virtually impossible.
-
If you forget/lose the Coldcard PIN, the private keys can be reconstructed by entering the original Seed Phrase and BIP39 Passphrase from backups into a new Coldcard (or other similar device).
-
Even with the correct Seed Phrase and BIP39 Passphrase, there can be some potential difficulty with the "derivation path" used by the wallet, making recovery difficult. For any inheritance planning, you should try to note down at a minimum which wallet software and version of this software you used. If your wallet gives you the option of noting down the "descriptors" it used, this is preferable.
An example storage setup might look like this:
**Location 1** - [Seed] + [Coldcard Encrypted Backup File] + [Coldcard Encrypted Backup File Password]

**Location 2** - [BIP39 Passphrase] + [Coldcard Encrypted Backup File]

**Location 3** - [BIP39 Passphrase] + [Coldcard Encrypted Backup File Password]-
Location 1 is missing the BIP39 Passphrase.
-
Location 2 is missing the Seed or Coldcard Encrypted Backup File Password.
-
Location 3 is missing the Seed or Coldcard Encrypted Backup File.
No location can re-create the wallet on its own, yet any two out of the three locations can be used to re-create the wallet.
For more redundancy you could for example duplicate two of the locations.
New Wallet Procedure⌗
-
Install GPG for your operating system
-
Check Coldcard device authenticity
-
Create a Coldcard PIN
-
Upgrade Coldcard firmware
-
Create a new wallet seed
-
Record the seed
-
Export a "Wallet Backup" file to SD Card
-
Add a BIP39 Passphrase
-
Export wallet ('skeleton') from Coldcard to an online wallet software
-
Install Bitcoin Core
-
Install Specter Desktop
-
Send a test amount of Bitcoin to first receive address
-
Factory erase Coldcard. Test backup process
-
Send full amount
Install GPG for your operating system⌗
GPG is a cryptographic library allowing encrypting, decrypting, signing and signature verification of binary data. As we will be downloading extremely sensitive software "binary" files (where "binary" simply means "already compiled" and no longer readable by humans), it is essential that we verify the binaries have been (cryptographically) "signed" by the developers we expect and trust. This stops a malicious entity being able to compromise the website and replace the download there with a malicious binary file.
However a cryptographic signature from a devloper cannot protect against a developer themselves acting maliciously. For this, we must rely on Bitcoin Core’s rigorous, decentralised and open-source review process. As part of this process each update to the software is checked and tested by multiple people. When a "release" is being packaged (lots of updates bundled together into a new software "binary"), multiple developers will verify that they all get exactly the same code output, before the release is "blessed" with the signature of the Bitcoin Core "signing key".
To install GPG for your operating system:
-
For MacOS I recommend using "GPGTools" https://gpgtools.org.
-
For linux, check your distribution’s package manager. Most linux distributions come with
gpgpre-installed.
It is noted in the instructions in the appropriate places, but on MacOS the sha256sum command is not readily available. Where you see this command while using MacOS, you should replace it with shasum -c 256.
Install Bitcoin Core⌗
This step is going to take the longest so we will start it off first, even though we won’t need it until later.
-
Download Bitcoin Core from here: https://bitcoincore.org/en/download/
-
Verify the downladed file before installing:
-
Follow the instructions on the download page to verify the download using your operating system. (Scroll down to section "Verify your download").
-
The signing key should be
01EA5486DE18A882D4C2684590C8019E36C2E964.
-
-
Install Bitcoin Core using the downloaded and now verified installer.
-
At first startup you have the option of storing the full transaction ledger (~350 GB) or running in "pruned" mode.
-
I would recommend pruning to about 5 or 10GB as your free storage dictates.
-
-
Let it begin to sync… will likely take about 12 - 96 hours uninterrupted (depending on internet connection speed and your hardware specs).
-
Open Bitcoin Core config file in a text editor (e.g. TextEdit / Notepad) using the button shown in the image below, and add the following two lines to it:
server=1 blockfilterindex=1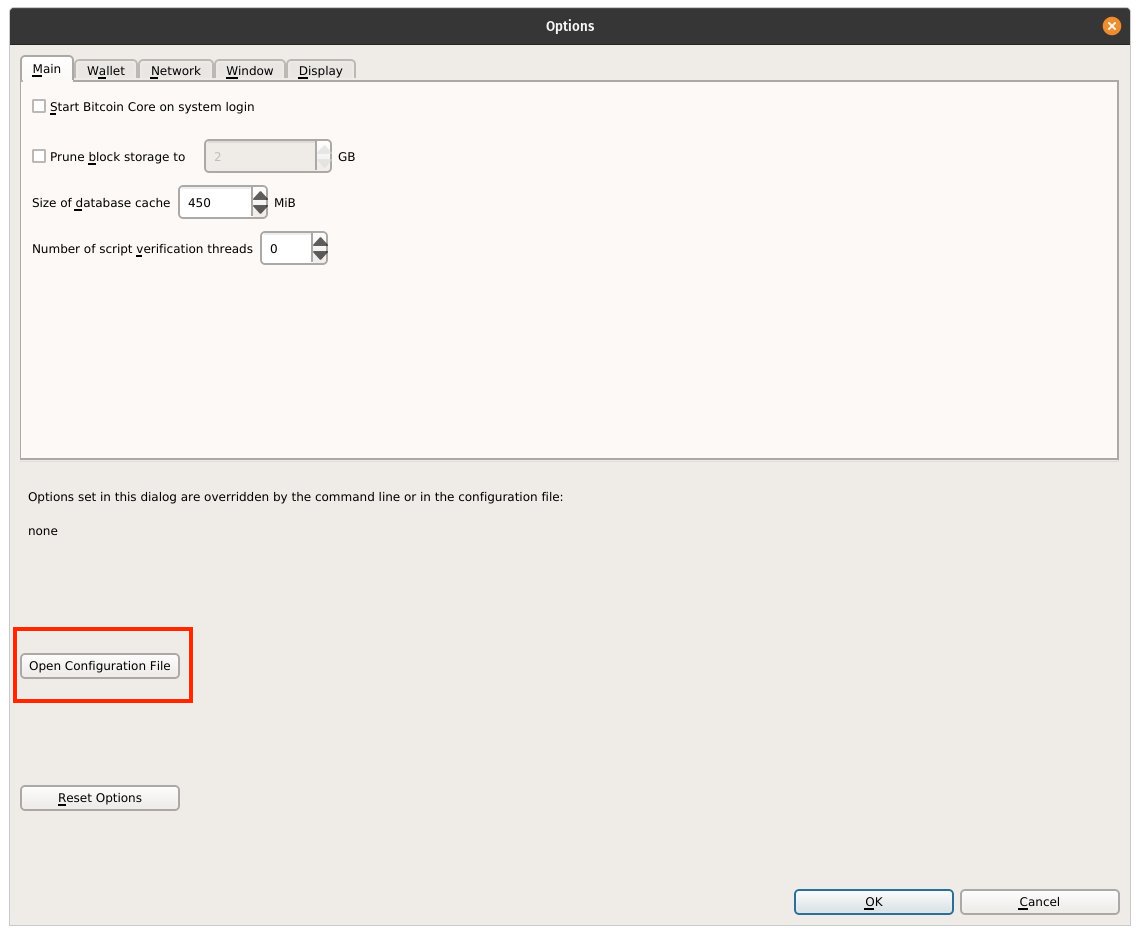 Figure 1. Bitcoin Core Config File
 -
Let it finish syncing in the background.
Check Coldcard device authenticity⌗
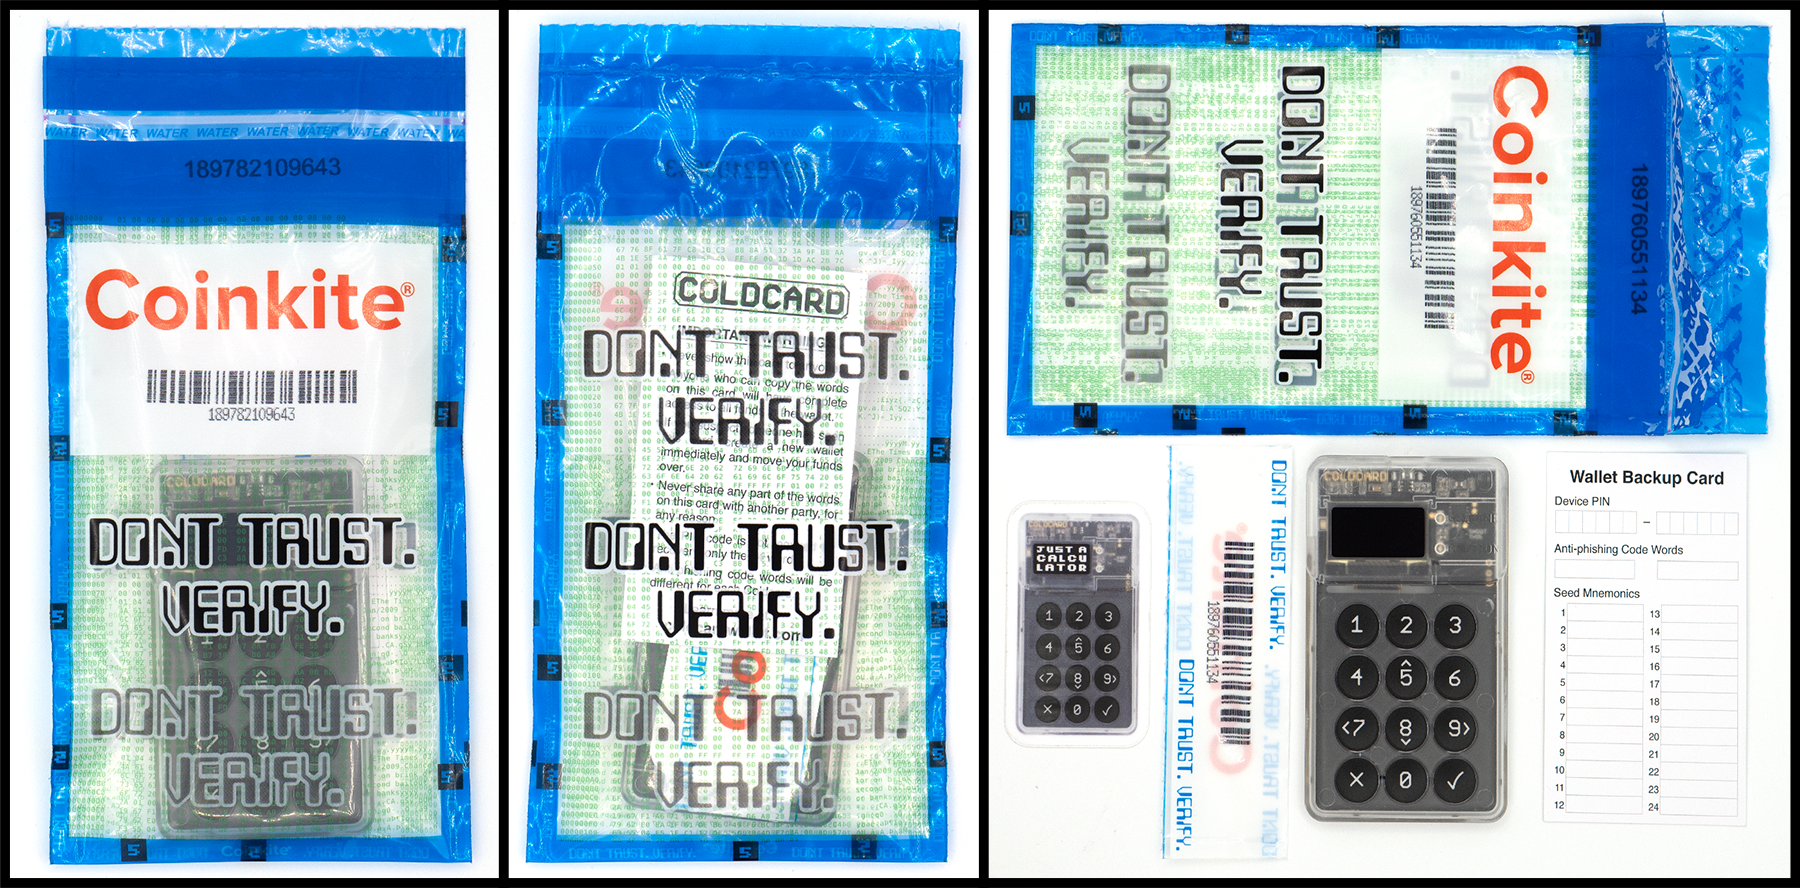
The Coldcard will be checked for integrity using the security features built in, see supply chain protections.
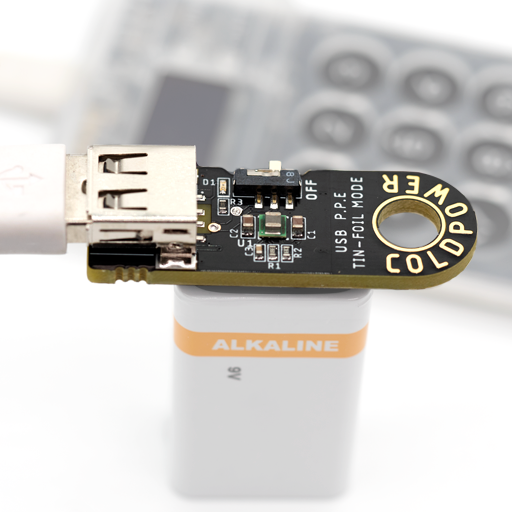
It will from now on only be powered up via i) USB power bank, ii) Cold Power or iii) other power-only USB cable so that data cannot be exfiltrated from the Coldcard via the USB connection. It should not be connected to USB port of a computer at any time or for any reason.
Create a Coldcard PIN⌗
Before the device can be used you must select a primary PIN. This is your main defence against random people using your Coldcard when you are not around. Please pick good PIN codes!
On the Coldcard, the PIN consists of two parts, like these examples:
12-34
1234-5678
872323-39843
12-345678
The first part is called the prefix (1234-) and the second, the suffix (-4567). Each part must have between 2 and 6 digits. The prefix determines the anti-phishing words you will see each time you login.
When you pick your PIN code, you’ll see the "anti-phishing" words associated with the PIN prefix. These words will be unique for each Coldcard. You may want to experiment with a few different PIN prefixes until you find some fun or memorable words. Regardless, you will need to remember those words, as it’s important to verify those words before proceeding to the second part of the PIN —- every time you login to the Coldcard.
The anti-phishing words protect you against evil maid attacks. If the device is altered in the hopes that it can be compromised the next time you enter the genuine PIN number, the anti-phishing words will be different after you enter the PIN prefix, and you can abort entering the rest of the PIN.
Upgrade Coldcard firmware⌗
The manufacturers guide for updating firmware can be followed, including the "advanced" download verification section. It can be found here: https://coldcardwallet.com/docs/upgrade#upgradenow.
A dump of the manufacturers firmware upgrade guide, interpolated to include the GPG verification steps in a more easy-to-follow order, is copied below. Some of these commands involve running commands in the "Terminal", which is readily available on MacOS and Linux machines. I have also added in some steps detailing when to open the terminal and how to navigate between folders.
We will assume the downloaded files will go into your downloads folder which on MacOS might be: /Users/your_name/Downloads. Amend this path as necessary and substitute it into the commands below everywhere you see $DOWNLOADS.
-
Download and verify the latest firmware release. This should download into your
$DOWNLOADSfolder from your browser. -
The release binaries may be verified using this clear-signed text file which we download below, and GPG. The commands are as follows, lines beginning with
#are just comments and do not need to be typed:
# change directory into your downloads folder
cd $DOWNLOADS

# download the signatures file which has signatures over the firmware files
curl "https://raw.githubusercontent.com/Coldcard/firmware/master/releases/signatures.txt" -o signatures.txt

# import the GPG key 4589779ADFC14F3327534EA8A3A31BAD5A2A5B10 into your GPG Keyring
curl "https://keyserver.ubuntu.com/pks/lookup?op=get&search=0xA3A31BAD5A2A5B10" | gpg --import

# to verify the signatures in `signatures.txt` are signed by the key imported above
gpg --verify signatures.txt

# SHA256 the dfu file itself. Amend the filename in the next command if you download a newer version of the firmware.
# `tab` key can be used to autocomplete filenames in the shell when in the right directory.
# On MacOS replace 'sha256sum' with 'shasum -a 256'
sha256sum 2019-12-19T1623-v3.0.6-coldcard.dfu-
Note it is critical to check the hash generated by the above
sha256sumcommand matches the appropriate line shown insignatures.txtfor the version of firmware downloaded. -
Save the 20…-coldcard.dfu firmware file onto a SD card.
-
Power up your Coldcard and unlock it with your PIN.
-
Go to the
Advanced > Upgrademenu and click onFrom SD Card.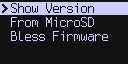 Figure 4. Coldcard Upgrade From Micro SD
 -
After the confirmation dialog, Coldcard will upgrade and reboot (slow).
-
Type in your PIN again. Verify new version running with:
-
Advanced > Upgrade > Show Version -
If you powered down during this process, to get a green light again, you may need to use:
Bless Firmwarein that menu.
A neat video showing how to verify the downloaded firmware can be found here.
Create a new wallet seed⌗
-
On the Coldcard choose
Create a new wallet.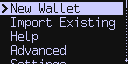 Figure 5. Coldcard New Wallet
-
Press the
4key to add dice rolls into the entropy already used to generate private keys. -
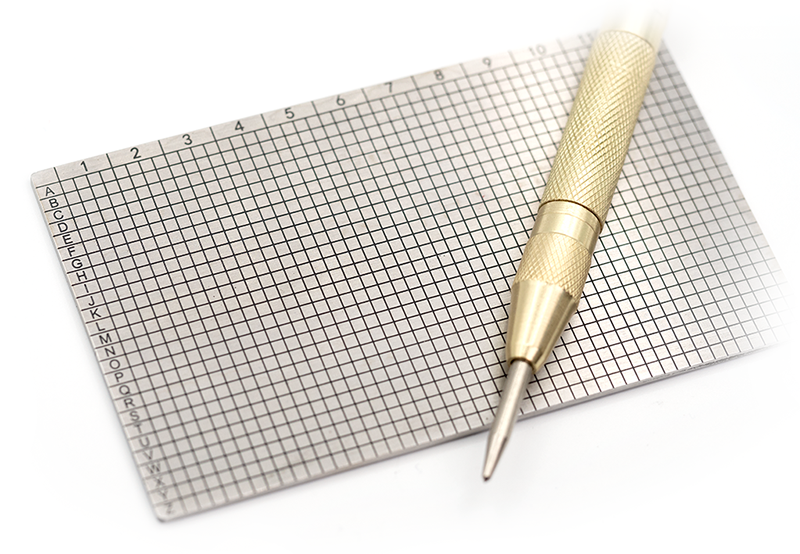
Roll dice at least 100 times. Ideally dice are casino-grade for maximum randomness, otherwise a mixture of dice types could be used.
 Figure 6. Casino-grade dice
 -
If you wish to verify the dice rolls you can by following along here.
-
-
Record the (non-critical)
device fingerprintwhich can help to verify that the seed has been restored correctly in the future. This does not need to be kept secure or private.
Record the seed⌗
Now record the generated seed into your long-term seed storage solution.
Follow the scheme provided by your backup product, usually this will involve etching or punching words in order as shown by the Coldcard into your backup product.
Export a "Wallet Backup" file to SD Card⌗
You can find the manufacturer’s guide to making (encrypted) SD Card backups here: https://coldcardwallet.com/docs/backups.
Your BIP39 passphrase, if defined, is not stored in the backup, and the backup file contents are not affected by the passphrase.
To create an encrypted backup:
-
Insert a blank SD Card
-
Pick
Backup Systemfrom the menu.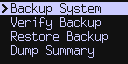 Figure 8. Coldcard Backup System
 -
Coldcard will pick 12 words as a password. These words have nothing to do with your wallet seed and are chosen randomly.
-
Write these words down, possibly into a Password Manager or another Steel Backup solution.
-
-
Eject the SD Card and store it securely.
There is no plausible deniability here: the .7z file on the SD Card is clearly a Coldcard backup file. But with BIP39 passphrases in play, even if forced to decrypt your backup, there is still one final secret protecting your wallets.
Add a BIP39 Passphrase⌗
Manufacturer documentation on using a BIP39 Passphrase can be found here: https://coldcardwallet.com/docs/passphrase.
-
Record the Passphrase you wish to use in a Password Manager (or similar). A free and open source Password Manager is Bitwarden. Around 10 - 16 alpha-numeric characters would be ideal.
-
Alternatively an additional Steel Backup solution might be able to be repurposed into a Passphrase storage solution.
-
From the Coldcard menu choose
Passphraseto enter a new Passphrase.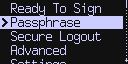 Figure 9. Coldcard Passphrase
 -
Enter the Passphrase by transcribing from the password as you have written it down.
-
Record the now-updated (but still non-critical)
device fingerprintwhich can help to verify that the BIP39 Passphrase has been entered correctly in the future. This does not need to be kept secure or private.
Export wallet ('skeleton') from Coldcard⌗
-
Insert a MicroSD card into the Coldcard.
-
On the Coldcard, go to:
Advanced > MicroSD Card > Export Wallet > Electrum Wallet -
Read and approve the warning message.
-
A new file,
new-wallet.json, is written to the MicroSD. -
Eject the Micro SD Card and save it until step Install Specter Desktop.
Install Specter Desktop⌗
Download and verify downloaded files⌗
-
Download Specter Desktop from the downloads page: https://github.com/cryptoadvance/specter-desktop/releases.
-
Now we will perform a similar file signature verification to the Coldcard firmware, where again
$DOWNLOADSrepresents your downloads folder, e.g./Users/your_name/Downloads:# Change to your downloads directory cd $DOWNLOADS # Download the Specter signing key curl "https://stepansnigirev.com/ss-specter-release.asc" -o ss-specter-release.asc # Check the downloaded key matches short ID: 36ed357ab24b915f gpg --with-fingerprint --verbose ss-specter-release.asc # Import the Specter team's signing key into your GPG keyring gpg --import ss-specter-release.asc # Download the signed file hashes curl "https://github.com/cryptoadvance/specter-desktop/releases/download/v1.2.2/sha256.signed.txt" -o sha256.signed.txt # Verify the signature on the signed file hashes gpg --verify sha256.signed.txt # Confirm computed file hash matches the one signed in the file # Might need to amend the 'specter_desktop-v1.0...' file name if you downloaded a different version # On MacOS replace 'sha256sum' with 'shasum -a 256' sha256sum -c sha256.signed.txt specter_desktop-v1.0.0-x86_64-linux-gnu.tar.gz | grep OK -
Install Specter Desktop by opening the downloaded file (
.dmg,.exeor.deb) and following the installer.
Run Specter⌗
-
When you run the installed Specter Desktop application it should automatically detect the Bitcoin Core application is running and "connect" to it.
-
You should choose
Run local Specter Serverfrom the option popup on first use. -
If it doesn’t detect and connect to Bitcoin Core, then likely your Bitcoin Core config file does not include
server=1. Open the Bitcoin Core config file again, addserver=1and save. Close Bitcoin Core and once it’s closed, immediately re-open it and restart Specter Desktop.
-
-
Now we want to import the Coldcard into Specter Desktop:
-
Insert the Micro SD Card from step Export wallet ('skeleton') from Coldcard into your computer.
-
In Specter Desktop click
Add new devicefrom the menu on the left. Figure 10. Specter Add new device
 -
Name it whatever you like, choose device type
Coldcard. -
Click
Choose filesfrom the "Setup device" page. -
Choose the file
new-wallet.jsonfrom your inserted SD Card. -
Click
Continueto import the wallet file into Specter.
-
-
Next we add a new wallet:
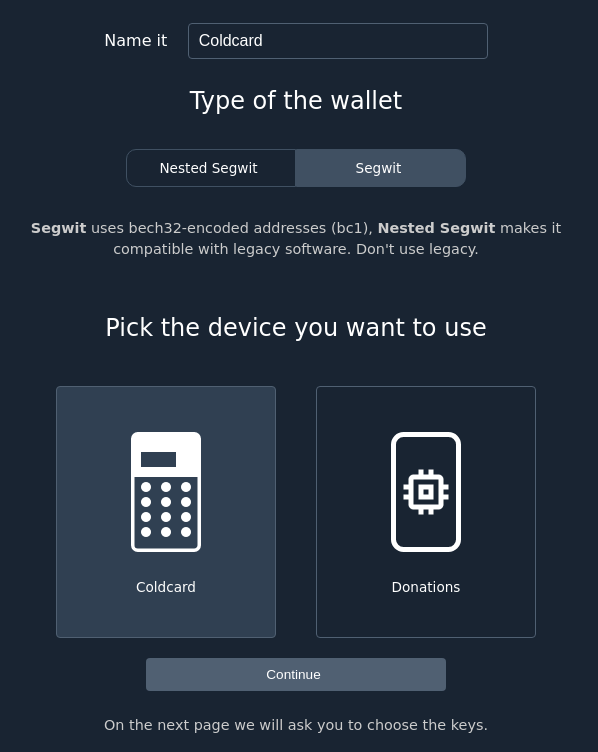 Figure 11. Specter Add new wallet
-
For "wallet type" choose
segwit, you can name it whatever you like. -
Choose the Coldcard as the device.
-
Click
Continue. -
If you already have funds in the wallet, you might see a zero balance. Don’t worry! All it needs to do is rescan the blockchain now that it knows which keys belong to you.
-
If you need to re-scan — once Bitcoin Core has finished syncing — click the
Rescan UTXObutton from the Specter Wallet page for your wallet.
-
Send a test amount of Bitcoin to first receive address⌗
Now we have completed the following steps:
-
Check Coldcard device authenticity ✓
-
Create a Coldcard PIN ✓
-
Upgrade Coldcard firmware ✓
-
Create a new wallet seed ✓
-
Record the seed ✓
-
Export a "Wallet Backup" file to SD Card ✓
-
Add a BIP39 Passphrase ✓
-
Export wallet ('skeleton') from Coldcard to an online wallet software ✓
-
Install Specter Desktop ✓
Once Bitcoin Core has finished synchronising, we are finally ready to send an amount of bitcoin to it! Most of those steps were one-time setup jobs and will not have to be repeated for a second wallet, or a new/replacement Coldcard. In this case you simply open your new hardware wallet, generate a new seed, write it down and export it via SD Card into Specter. Done!
So let’s send a test amount of bitcoin to the Coldcard.
First we will check that Coldcard receive addresses match those shown in Specter. This will stop any painful-to-recover "missing" funds in the future (due to wrong/unknown "derivation path"). The manufacturers guide on using the "address explorer" can be found here: https://blog.coinkite.com/address-explorer/.
First Specter Desktop:
-
Simply select your wallet from the menu on the left
-
Click the
Receivetab up at the top to be presented with the first receive address -
Leave this up on the screen and move to the Coldcard section below
For the Coldcard:
-
On the Coldcard, go to the
Advanced Menu, and selectAddress Explorer -
A list of different bitcoin payment addresses is shown.
-
Pick the first receive address Specter Desktop showed you.
-
Coldcard will use that to determine the correct BIP32 derivation path and address format (segwit, legacy) for your wallet.
-
(optional) Insert a MicroSD card, and press (1). The first 250 addresses will be written onto the card in a simple text format (CSV = Comma Separated Values).
If you have a match between Specter Desktop and Coldcard, send a test amount of bitcoin to it and wait for it to be confirmed.
Factory erase Coldcard. Test backup process⌗
Now we test your Seed backup, BIP39 Passphrase backup (and optionally Coldcard Encrypted Backup and Coldcard Encrypted Backup Password)…
Wipe Seed from device⌗
|
Warning
|
Your test amount of bitcoin is at risk in the next step. If your backups were no good, it will be lost forever! |
-
Perform a factory reset of the Coldcard
-
On the Coldcard choose
Advanced > Danger Zone > Destroy Seed.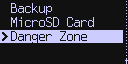 Figure 12. Coldcard Danger Zone
 -
Follow the prompts to wipe the seed from memory
-
Your PIN will be retained (we don’t need to test that).
-
-
Return to the main menu and follow the Restore Existing Wallet Procedure steps on restoring from your seed backup and adding your BIP39 Passphrase again.
Make a transaction using Specter⌗
With the Seed and Passphrase restored:
-
In Specter Desktop, create a new transaction spending your test bitcoin transaction (sending it to yourself at a new receive address is fine).
-
Export the transaction ready to be signed by the Coldcard by clicking the
Coldcardbutton underneath "Sign transactions with your". -
Save the unsigned transaction to SD Card File by selecting
Sign with SD Card fileand thenDownload transactionand then choosing your SD Card as the save destination. In the example below we will assume we saved the transaction file using the nametransaction.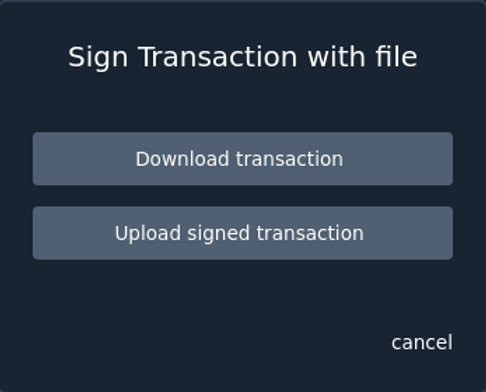 Figure 13. Specter sign transaction with coldcard
 -
Eject the SD Card from the computer.
-
Insert the SD Card into the Coldcard.
-
Click
Ready To Signfrom the Coldcard menu.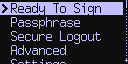 Figure 14. Coldcard Ready To Sign
 -
Find the transaction called
transactionfrom above in the file list and select it. -
Carefully check the address funds are being sent to on the screen of the Coldcard are what you expect. This double check on the screen of the Coldcard is what will foil 99% of possible malware vectors.
-
Click
Yesto sign the transaction on the Coldcard. -
This creates a
transaction-signed.psbtfile on the SD Card. -
Eject the SD Card from the Coldcard and insert it back into the computer.
-
Back in Specter Wallet, in the
Sendtab, clickColdcardbelow the words "Sign transaction with your" to start transacting with your Coldcard. -
Choose
Send transactionfrom the popup menu.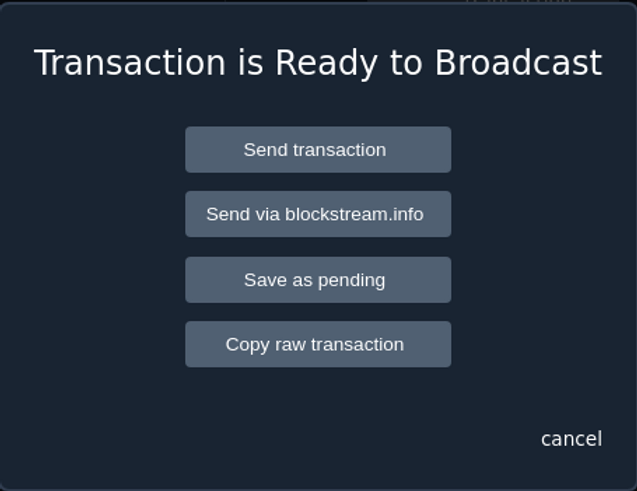 Figure 15. Specter broadcast transaction
 -
Select the
transaction-signed.psbtfile which the Coldcard created after it signed the transaction. -
Choose
send transactionto send the transaction.
Send full amount⌗
With backups thoroughly tested, you are now ready to move your stash.
Yes. It’s still always scary.
Restore Existing Wallet Procedure⌗
This is going to involve pretty much the same steps as setting up a new wallet. We will assume though that you have already done the following steps:
Restore seed from backup⌗
So the first step is to use your seed backup to restore the seed into the Coldcard:
-
From the Coldcard menu choose
Import Existing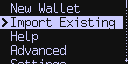 Figure 16. Coldcard Import existing
 -
Choose
24 words(or different if you have a Seed of different word length, but you shouldn’t if you followed the above!) -
Insert the words from your Seed one by one, in correct order.
Add BIP39 Passphrase⌗
-
Follow the same steps as section Add a BIP39 Passphrase to add the Passphrase to the Coldcard.
Specter⌗
-
If you need to add the wallet to a (new) Specter Desktop installation, then follow the steps in section Export wallet ('skeleton') from Coldcard to export the wallet "skeleton".
-
Next follow the steps in section Run Specter to import the wallet into Specter.